Today at the dollar store, I found a paper lanterns with battery tea light and decided to try it out.
HOW TO:
materials-
1 paper lantern
3 flower stems
hot glue
string and tac (to hang)
Assemble the paper lantern. (I hung mine from my kitchen cabinet so that I could work on it.)

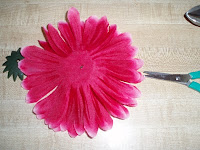
Take the backs of the flowers. Glue the center and petals together. Trim the back off the center so that it is flat.
Glue the flower to the lantern. Make sure the flower petals overlap. Glue some of the petals to the lantern where the flower petals fall away too far.

To further fill the space, trim extra flower petals and glue them in where needed. Use them to fill where the lantern images are easily seen.
WHAT I LEARNED:
* Next time I will use smaller flowers. That way can cover the lantern completely. (Like craftynest.)
* I will use lighter colored flowers as well. My lantern had print on it so I needed to cover it, but I think yellow flowers would look really cute as well.
* The lantern I purchased had a tea light that changes color, so having some of the original lantern show was a good idea.
*The whole project took a little over an hour, but next time it should go faster.
* In order for these to be table top, the flowers should not be so close to the bottom.
The tea light changes colors so I tried to take some pics where you could see that. Sorry for the blur, I could not get my camera to cooperate. (purple, red and green)
Thanks for stopping by!!


No comments:
Post a Comment