I found this great site called Wordle. I have seen images like these before, but had no idea how they where made. Yesterday I played on this site for over an hour. Then inspiration hit - I should make one of these for my kids.
They came out WONDERFUL so I have to share.
(I am going to paint the frame pink.)
Materials:
paper (resume paper I had laying around)
8x10 picture frame (dollar store)
computer & printer
On wordle I entered each child's name in all capital letters, about 7 times. A word detected more often will be enlarged. I then entered lots of descriptive words for my kids in lower case. For example, my little girl was "sweet, diva, smile, princess." You get the idea.
Once you enter the words, the next stage has to do with the way the final product will look. You can change the font, the orientation of the words, and the color scheme. I found I could not select what color specific words where. (If you find this out, let me know.) Also, there are set color schemes you can use or you can customize your own. I wanted all pink tones for my daughter so I had to find a website that would give me the code for the colors I wanted. In comes this Hex Color Code Generator. I selected the pink tones on the spectrum, found the color scheme suggested, and entered them into wordle.
Once you have the image how you like it, you only have two options: print or save to gallery. I printed mine on some nice resume paper I had left over from my other life.
I purchased an 8x10 picture frame from the dollar store. I took the stand off the back so that I could place it on the wall without the bulk.
Now all you have to do is trim the printed image, reassemble the frame and hang it up. YOU ARE DONE!
I hung mine on their doors using Command Picture Hanging Strips.
As I was falling asleep last night I realized this would make a great wedding gift for a friend. I am going to put in their names with words to describe them and marriage. I also have one made for our family. I have a feeling this site will be on my "go to" list for quick, inexpensive gifts!
I hope you have an much fun as I did.
Thanks for coming by!!
Friday, February 19, 2010
Friday, February 12, 2010
It's COLD outside
We had a record breaking snow fall yesterday here in the DFW area of North Texas. 12 1/2 inches!!
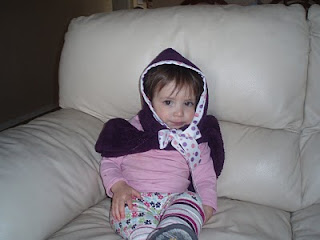
Of course, living in Texas, my daughter does not have a winter hat. I always have fleece laying around. I like to buy inexpensive fleece blankets to cut up when I want to try a pattern.
I went online to find a pattern for a fleece hat for my little girl. I did not find a pattern that I liked. Then I thought about a scarf. Through the magic of internet I ran across a "hooded scarf." On about.com I found a great pattern.
Like always, the great thing about fleece is that you don't have to finish the edges. I did add some ribbon around the hood to be tied around the neck. I spent more time ironing the ribbon in half and pinning into place than sewing it.
Great quick project, easy to follow instructions and beginner sewing skills OK. How great would this look with a pom pom on the top, or ribbon around the whole scarf, or in PINK!!
Thanks for reading!!!
Thursday, February 11, 2010
Working on
Tuesday, February 9, 2010
Valentine Cards
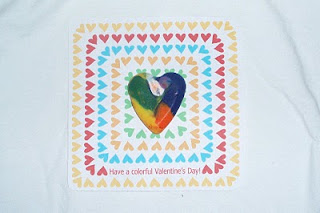
I know I am not the only one that is watching their wallets this year. For my son's school, he needs 22 cards for Valentines Day. The other day I found this wonderful option. Thank you to the Long Thread for sharing.
If you have little kids, you probably have more crayons that you need. What a wonderful way to put them to work.
I did not have a heart mold when I began. I was walking through Target and spotted some ice trays for $2.50. They where made out of silicone, but did not have a label which stated they where dishwasher safe. I was wondering since I planned to put them in the oven. So I looked online for the general degree resistance of silicone. Sure enough, it would take a ton of heat to melt them.
I put them in the oven at 250 degrees and they came out fine. Also, I did this more than once. The first time I made the crayon hearts, I used rose art crayons. Those came out with a wax that had floated to the top. This wax does not draw. I then used a crayola crayon. Once again, they prove why they are my favorite brand.
Let me show you some pictures:
$2.50 ice trays: probably could put some pam in the trays to make the crayon not stick so much
Finished cards. Stuck the heart on with sticky squares from the dollar store. (already on hand)
Ohh, let me share one more thing. My new favorite shoes what I got for $7 on clearance at Marshall's.
Thanks for coming by!!
Wednesday, February 3, 2010
Staying Busy
The work on my desk has come to a stand still. It is too cold to try and stain it. I know that I would be wasting effort if I stain now. So, I am waiting for Texas weather to get back to normal. Meaning, get back to being warm in the winter.
I found this tutorial a long time ago at Make and Takes. I have actually had all the supplies on hand as well. I ordered Diamond Glaze right after I saw this. I finally got around to making some tiles. I am not going to use all of them as pendants. Some may become push pins or magnets.
Here is what I have made:
I have some other items I am working on...coming soon.
Subscribe to:
Posts (Atom)