Showing posts with label birthday. Show all posts

Monday, May 2, 2016

New Toy...Cricut Explore

For years I have had a Cricut. I bought it off of Ebay back in 2009. This is exactly like mine:
In all honesty, I have not used it all that much. I quickly found that having to buy cartridges and having a cutting surface only 9" wide where limitations. In the end, I only ever bought three cartridges. I just couldn't convince myself to spend $30-$50 dollars buying images I wasn't even sure how often I would use.

The main use for my cricut was for party decorations. My last cartridge was for my son's dinosaur birthday. I made these to decorate his cake. They turned out so cute, my sister still has one of these saved.

For my son's Pooh party, I used my cricut to cut letters for a banner.

With Mother's Day around the corner...I ordered this:
I am SO HAPPY with my new machine. I WISH I had upgraded a long time ago. I can't stop looking for projects to make. So far:


I am having a love affair with vinyl. The tumblers are for my childrens' teachers. Sorry for the poor lighting in the pictures, it was late when I finished them.

I am so glad that you no longer have to buy cartridges for the new cricuts. There is a whole database you can use from with both free and membership images.

My old cricut sat in it's box until I needed it. Now I want to find a place for my new cricut where I can use it all the time...like my printer.

Now to find a great online vinyl store so I don't go broke at the hobby store. We all know that while they hobby stores are great for getting items quickly, they don't always have the lowest prices.

Happy cutting!!!

Tuesday, June 2, 2015

Fun With Shrinky Dink

I remember playing with Shrinky Dink as a child. We would draw a design, color it, cut it out and then watch the oven mesmerized by the plastic as it would wrap up then flatten out. Of course times have changed, and so has Shrinky Dink.

I picked some up at the craft store the other day. This specific kind of shrink paper is able to go through the ink jet printer. The background is white, not clear.

I decided that it might be a cute idea to make some My Little Pony necklaces for the girls at my daughter's party. Then I realized I could use them as tags for the goodie lunch boxes.

I found images of each pony and put them onto a word document. I made sure to lighten them a bit, as directed on the Shrinky Dink instructions. At 50% lightened, the shrunken finished product was light. I really liked them since the colors where true. My daughter and husband liked the ones I made with the image lightened to 80%. Either way, I made a bunch.

My favorite part was still watching them shrink. There is a moment of panic when the picture curls up tight and I kept thinking it wouldn't lay flat. I know that very cheap shrinking paper will get stuck curled and be ruined.

I can't wait to buy another package of paper. The 40% off coupon will come in handy.

Here are some pictures of what I made.
Here are the tags I made.

Tags/ necklaces.

The top one was 80% lightened while the bottom was 50%.

My Little Pony cuteness. 

Thursday, May 14, 2015

My Little Pony Party


Originally my soon to be 7 year old wanted to have  her party at home. She picked My Little Pony as her theme. Having a party at home puts me into create mode. I started looking on Pintrest for ideas and buying things as I came across them.

Then she dropped a bombshell on me...she wants her party at the rollerskating ring. WHAT?!?! How could she do that to me? I was already on a roll with tons of ideas planned. I was crushed.

Of course that only lasted until I realized I don't really have to do anything for this party then. I can just make the goody bags, order the cake and go!

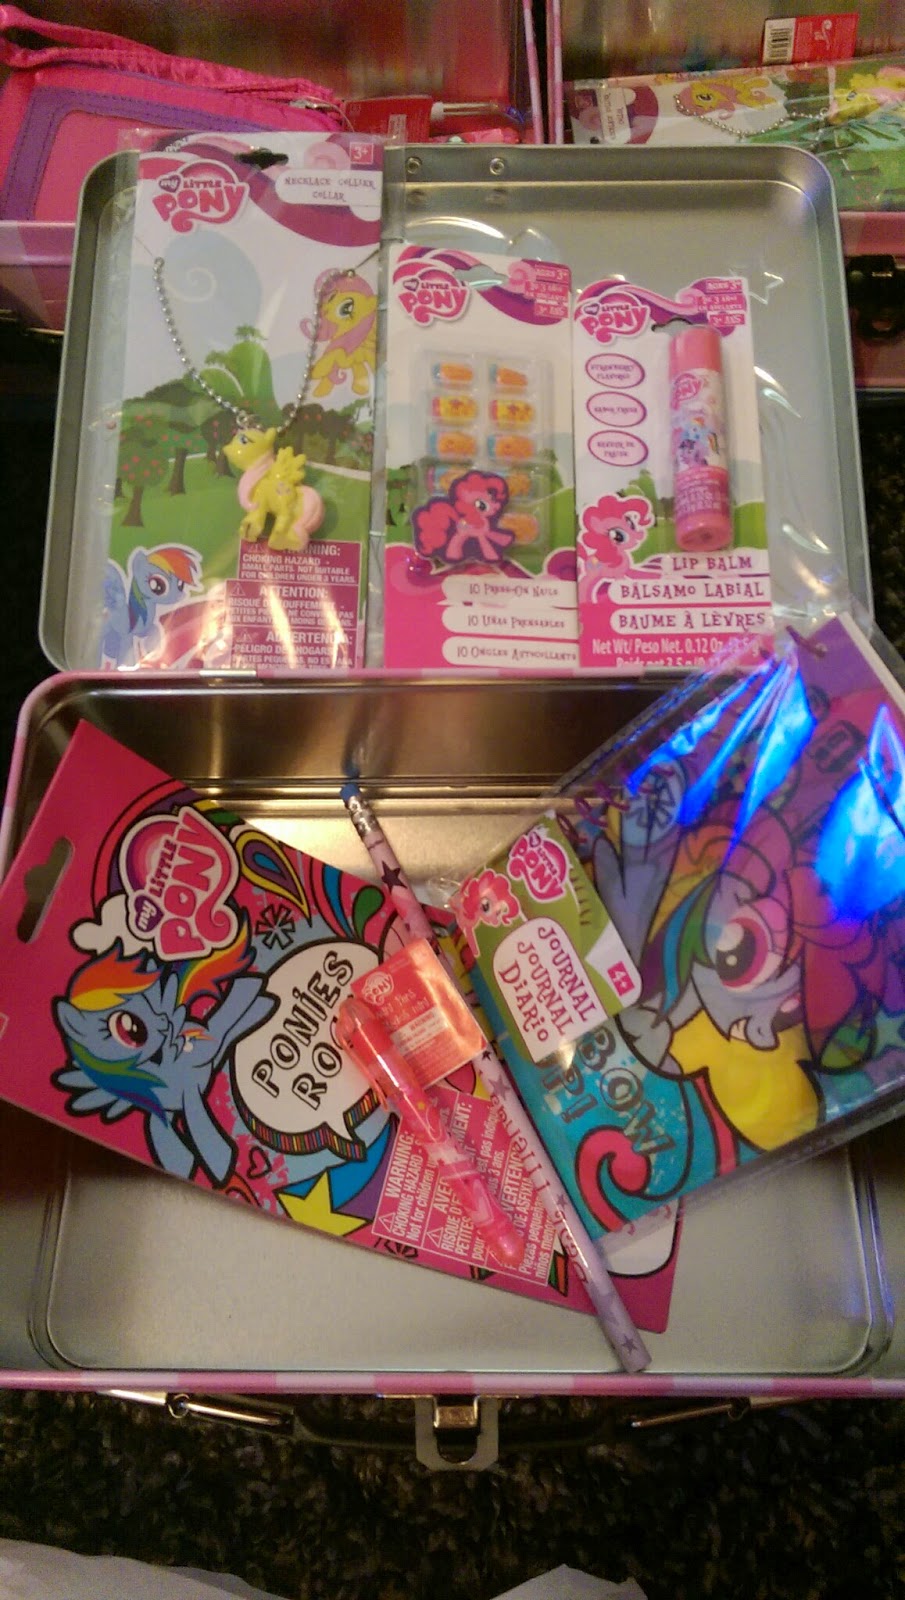
One day at Micheal's they where having an awesome clearance sale. They had MLP lunch boxes for under $4.00. I counted out how many girls will be at the party and picked them up. The goodies for inside the box that where under a $1.00 where: MLP stickers, notebook, press on nails, and mini pens. I was able to get other items for under $2.00. Each girl gets one of these. I have to say, I want one for myself!!! They are way too cute and so much fun. I am going to use my Cricut to cut out their names in vinyl and label each one so there is no confusion.

Front and back of the lunch box.

These goodies where about $1.50 each.

Found these at Walgreens for $1.50.

All these goodies where under $1.00.


For the boys I am just going to give them candy and a few trinkets. Maybe even a character cup...thinking minions...which I can pick up at the Dollar Tree.

So I am left with the want to do a MLP party and a great Pintrest board of ideas. Have your kids ever done this to you??

(Update: Added pictures on 5/18/15.)

Thursday, November 20, 2014

3rd Dino Party Done!

The dino party is done and it was a success.

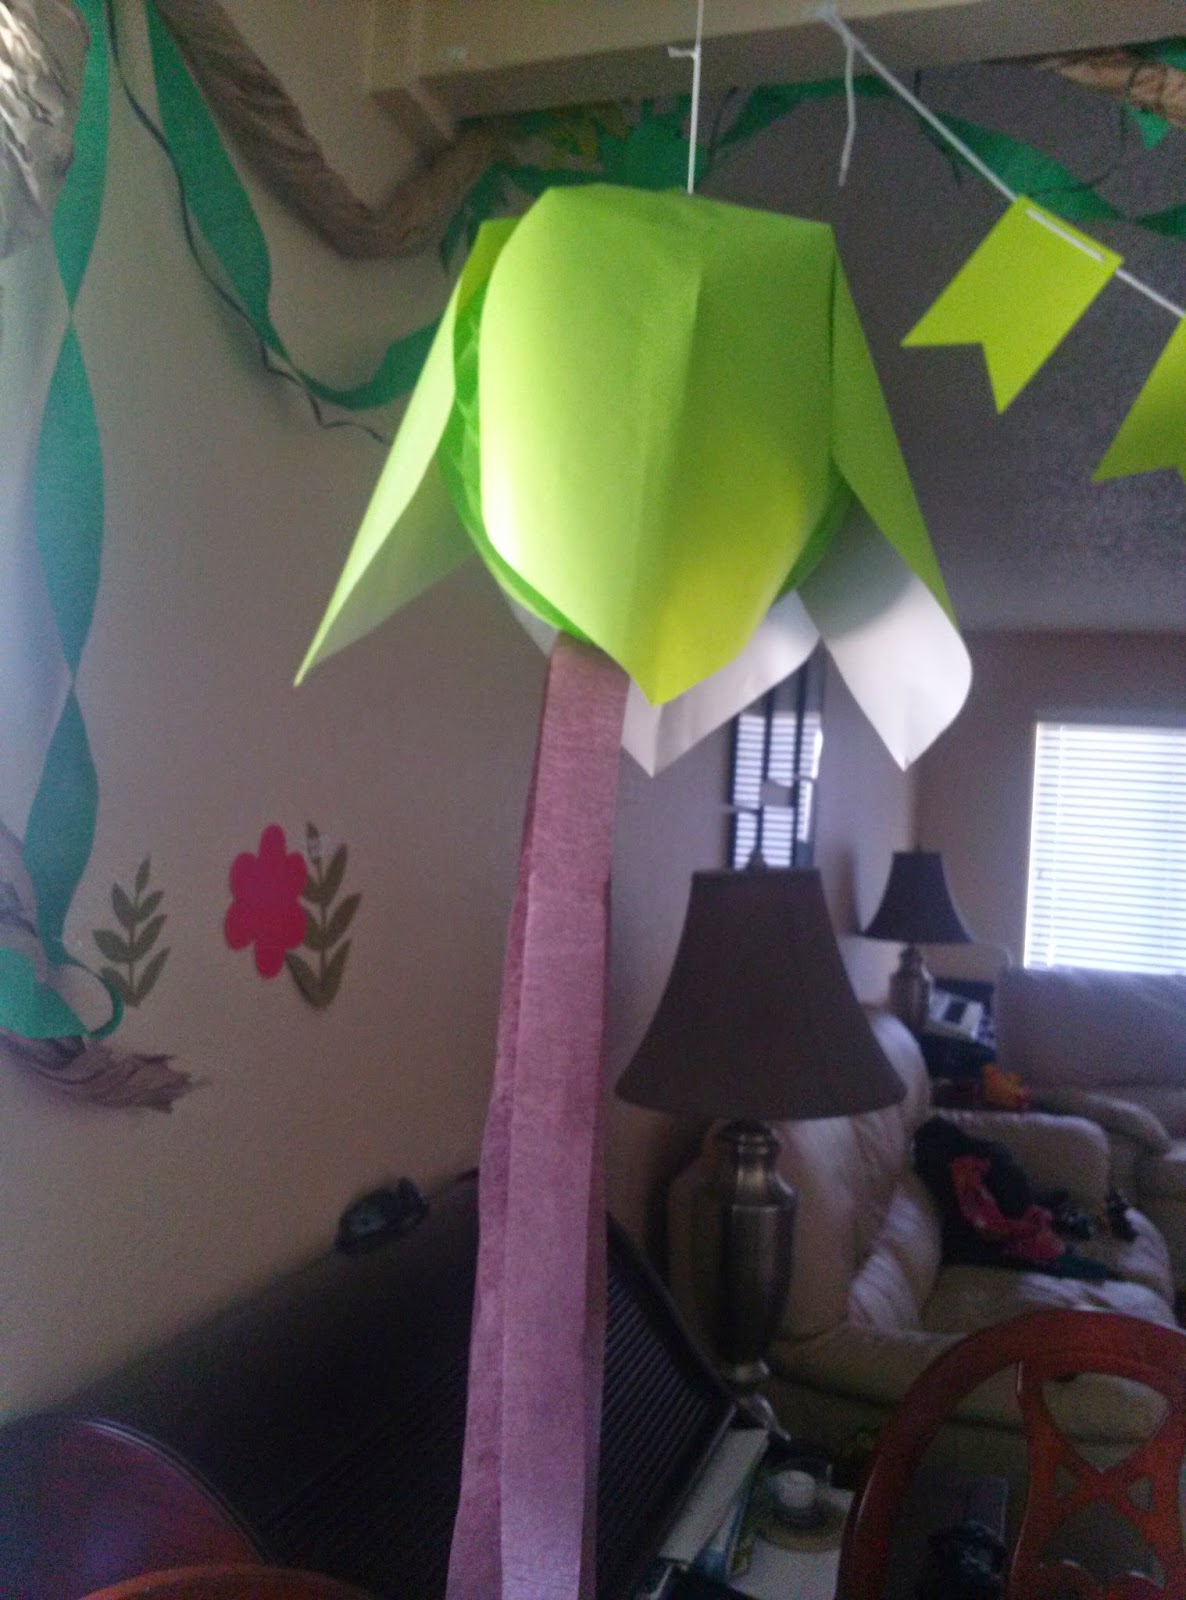
The decorating consisted of leaves, vines and even some flowers. I hand cut most and then used my Cricut for others. The store bought decorations that I used where picked up on clearance at Target. I love to score decorations for a dollar or less.

On Pintrest I noticed all the dino eggs and could not resist making them. I am so glad my sister came to help me make the goody bag...dino eggs. Here is a little something I learned: flour paper mache takes a long time to dry. I only had a few days to make the eggs so we used Modge Podge. While this may be an expensive avenue, the drying time between coats is 20 minutes. We could not have made 20 if we where waiting hours for things to dry. We used brown and tan tissue paper as the final layer to give them a uniform finish.

Amazon was my dino headquarters. I found dino masks, bubbles, stamps, temporary tattoos, small figures and piƱata. I also ordered a silicone dinosaur mold. I was really worried that the mold would not arrive in time. The mold came all the way from China. I used our favorite brand of dipping chocolate and made some candies we all loved.

Here are some pictures of the party.

The goodie bag EGGS. They where a huge hit.

Paper towel roll tree. Made two of these.

Cricut cut dinos for the cake.

Palm trees.
Looking at the room.

Thursday, October 30, 2014

3rd Birthday Party Time

I have stated before how much I love birthday parties. Well, in a couple of weeks my little guy turns 3. I went back and forth between a Mickey party or a dinosaur party. I asked him again last week and he said dinosaur. So the theme is set!! (Yes, I did have to send out invites on short notice. His birthday snuck up on me.)

Of course my first stop is ALWAYS Pintrest. I loved the parties where they used their plants from all over the house to decorate one room. Too bad for me I have a black thumb. Plants just DIE around me. What this leaves me with is making my own plants.

I picked up packaging paper at the dollar store and made vines to hang. (You just scrunch and twist.) Thanks for my stash of scrapbook paper, I have leaves. I used a Cricut to cut some of the leaves and then just free handed others. I made large leaves and small leaves. I also made flowers. If you google prehistoric flowers, there are some really pretty ones.
I have made a couple of trees for the table. My local dollar tree had some 2 oz Mod Podge. I picked up a couple. This allows me to do small projects without having to open my big 16 oz bottle.

Inspiration hit this morning and I made the door decoration. I also sketched a dino on a poster board. I will paint it later or maybe tomorrow when all the kids are in school.
I can't wait to finish up the decorations. I just have to wait out Halloween. 

Here are some pictures of my progress. Keep an eye out for an update on the party.


 Thanks for stopping by! 

Wednesday, September 10, 2014

Birthday Parties and Pintrest

I love birthday parties. I am the kind of person who will stay up all night to decorate. I start planning the birthday theme months in advance so I can keep an eye out for things to pick up when they are on sale. I make as much of the decorations as I can. For the goodie bags, I try to include as much as I can but spend as little as possible.

I have friends who do not like parties as much as me.  Being the great friend I am, I have told them "look on Pintrest." Yeah, that's not really helpful when you are not a crafty person and don't like parties.

Here are some simple things that you can do to make your party great, without having to be crafty.

1. Use streamers. Streamers are inexpensive and make for a quick party place dress up. If you don't want to hang streamers from the ceiling, just drape them on the wall, or put them up the wall.
I like to bring the streamers down the wall a little.

I removed a picture to cover the wall in streamers.

Streamer flowers
2. Make a birthday sign. You do not have to buy the "Happy Birthday" sign in the store. Use colored paper or book pages to make a unique sign.
The name banner is pages from a winnie the pooh book.

I took pages from a winnie the pooh book that had pictures on them and made a banner for the food table.

3. Cover the tables and surfaces with table clothes. Use solid colors, use the ones from the dollar store, use them on lots of surfaces. If you buy one from the store that has characters, use it on the table that will be the center of attention. Use accent colors for the area where the presents will go or if you have a table on the side with the goody bags. If your character table cloth is not big enough for the table you have, place solid color ones under it and then use it in the center of the table. Don't be afraid to layer them.
The table cloth made this table with the goody bags a part of the decor.

4. Balloons. Balloons. Balloons. We all know that nothing says party like balloons. I use them on the mailbox by the curb to make the party guest feel festive as soon as they pull up. The balloons don't have to be helium filled. I like to blow them up and tape them to the walls. (See picture above.)

5. Have fun. If you do nothing more than the above, the party will look great. The most important thing is that you set the tone for the kids. If the kids think you are unhappy with the party, they will be as well. Remember parties are a celebration. Don't stress if everything is not perfect or PINTREST worthy.

Which brings me back to Pintrest. I think as moms we tend to compare ourselves to other moms. We look at what they do and feel like we are inadequate. Don't fall into that trap. Use Pintrest to gather ideas not to get down on yourself. Use Pintrest as a tool to help you, not as a tool to make you spend more money.

I hope I have helped a little to make that next party less stressful.

Thanks for stopping by,

Thursday, June 12, 2014

Working Through the Stash: AG Goody Bags

A while ago I had a post about my addiction to craft supplies. I have been in serious need of some focused clean up.

A few years ago I developed a stash of tulle. For my daughter's first birthday I made her a really cute tutu for her cake pictures. Of course, not knowing what colors I wanted, I purchased a few. Since then the rolls of tulle have been in a bin.

My daughter's birthday this year has been all about American Girl...even though we purchased her a Journey Girl. The location where we are having her party provides gender neutral goody bags. As a special treat for her friends who also have American Girl dolls, we decided on AG goody bags. Inside they have a bracelet, a ring pop, an AG hair clip, an AG duck tape purse, an AG necklace and an AG tutu.

I have been able to use some of that tulle and ribbon that was sitting around. Since the necklaces and duck tape purses where made from supplies I got from the dollar store, they where really inexpensive.
Stack of finished tutus for AG dolls

Also, as part of using my craft supplies, I have been doing some sewing. I have made my daughter 2 dressed, 4 skirts, a pair of pants and some shorts for her doll. Her doll beds got new pillows and new reversible blankets. I have a stash of material picked up at the craft or fabric store clearance bin. AND some clothing I have kept with the idea to reuse it. Hope to make a serious dent in this stash.

Update 6/13/14: I finished the duck tape purses and necklaces for the goody bags as well. I made a few styles of bags. I had so much fun with these that I made a few for my daughter. She loves her collection.
These bags have empty Capri Sun packages as the base.

The center purses are made using my tutorial.


Saturday, November 23, 2013

Door Decoration

For my son's birthday, I made a number 2 to go on the door.

Our local Dollar Tree has some foam board. Part of the party decor was a tree that would go across the room. (We have a beam that divides our rooms.) I painted the foam board with brown acrylic paint. To vary the color, I watered down the paint. Once the paint dried the paper began to peel. So I did what any person would do, I peeled off the paper and used it to decorate the beam. I was left with the foam part of the boards. This "left over" board is what I used to make the number for the door.

I free handed the number and then used an exacto knife to cut it out. It did not matter that I had multiple pencil marks since the whole thing would be covered by streamer.

I used my hot glue gun (low temp) to attach the streamer to the number. The reason for the low temp is that I scrunched the streamer to make it ruffle. While the glue is hot, I pushed it together with my finger. High temp would be too hot and maybe even melt the foam.


I started at the bottom. The first piece of streamer I just glued down. I made sure to wrap it around to the back to cover the foam. I then began to ruffle it. All the pieces wrap around to the back. I also found it easier to just pull it off the streamer roll and cut once I was done making the ruffle.

For the very top, I just glued down a piece of streamer and wrapped it around to the back. To hang it on the door, I used a Command Strip. The number is really light.

While I was doing the number, I got an idea about decorating for Christmas. I made a Christmas tree for my door!!! I used the same technique. I see more door decorations made this way in my future!

How about:
a red heart
a four leaf clover
an Easter egg
red, white, and blue star
a pumpkin or bat

Of course, I have two other kids with birthdays. I am thinking of either their birthday number or their initial.

I will post pictures of my Christmas tree when it is done.

Thanks for coming by,


Friday, November 22, 2013

Birthday Party

Last week we had the 2nd birthday for my son. I love throwing parties. I love having a bunch of little kids running around, having a good time. I do not enjoy the cleaning up, but the other stuff really rocks.

I LOVE Pintrest when it comes to party ideas. I created a board just for his birthday. The theme was Winnie the Pooh.

Since I had the theme for months, I was able to really take advantage of Goodwill and other secondhand stores. I picked up all the stuffed animals that where Pooh related I could find. I then would wash them and put them in a bin. I also scooped up all the Pooh books. Instead of giving the kids a goody bag full of junk toys and candy (that they don't need since Halloween was not that long ago) I decided to give them a toy and book. My sister-in-law gave me some treat boxes she had left over from her son's birthday. Into these boxes I put a fruit chew bag and a cellophane bag with some honey teddy grahams.

One of the pooh books I purchased was older and a little warped. I took advantage of this fact to give myself permission to cut up the book. I used the pages to make a couple of banner. The first banner was for my son's name. The second banner consisted of pages with character drawings. I used this banner just to decorate. Did you know that you can sew book pages to ribbon on your sewing machine? I did not, but thought I would try it. Well, I was surprised when it worked so well.


I made a number for the front door and some honeycomb pattern to go on the wall. I also used pictures from a Pooh calendar to decorate. I finished it off with a beehive I found at Goodwill (I made bees for it), some picked fence food labels, a barrel for the silverware and I was done.

I will post some of the pictures and maybe a "how to" of the decorations.

Thanks for stopping by!!

All the best,